If you are thinking about getting your driveway or parking lot paved, you may be curious about what goes into the process of laying asphalt. A well-paved asphalt surface can elevate the appearance and functionality of your property, but only if the proper steps are taken. In this guide, we will break down the process of laying asphalt to help you understand how it works and what to expect.
Preparing for Asphalt Paving
Laying asphalt is more than just spreading a fresh layer of pavement. The groundwork is just as important as the final surface. Proper preparation ensures a smooth, durable result, while skipping critical steps can lead to premature damage, costly repairs, and a much shorter lifespan for your pavement. Careful planning and execution are key to long-term performance.
Site Evaluation and Planning
The first step is to examine the site’s layout and soil conditions. This determines whether grading or soil stabilization will be necessary before paving begins. A smooth, stable base is essential. Any uneven or unstable areas can cause cracks, potholes, or surface failures later on.
Drainage is another key consideration. If water collects in certain spots, it can gradually weaken the asphalt. Proper grading and sloping are planned in advance to direct water away from the surface.
The soil’s load-bearing capacity is also tested to make sure it can support the pavement. If the soil is too soft, it may need to be reinforced with compacted gravel or crushed stone for added stability.
Finally, this step helps determine the correct thickness for the asphalt layer. For example, a parking lot that will see heavy vehicle traffic will require more asphalt than a residential driveway. Consulting a professional paving contractor during this stage helps ensure the right preparation and materials are used for long-lasting results.
Materials and Equipment Needed to Lay Asphalt
Once the job has been properly planned, the materials and equipment must be gathered. The amount of materials needed will depend on the size of the project.
Quality is key when it comes to asphalt materials. Low-quality materials may save money in the short term but can lead to costly repairs and maintenance in the long run. High-quality aggregates, binders, and additives should be used for a durable and long-lasting pavement.
Materials:
- Sub-base materials: This is crushed stone or gravel used for reinforcing and stabilizing the soil beneath the asphalt.
- Asphalt Mix: A blend of aggregate (crushed stone, gravel, sand), binder (usually bitumen), and filler. The mix is heated to a high temperature so that it can be easily laid and compacted.
- Tack Coat: A sticky substance applied between layers of asphalt to promote bonding.
Equipment:
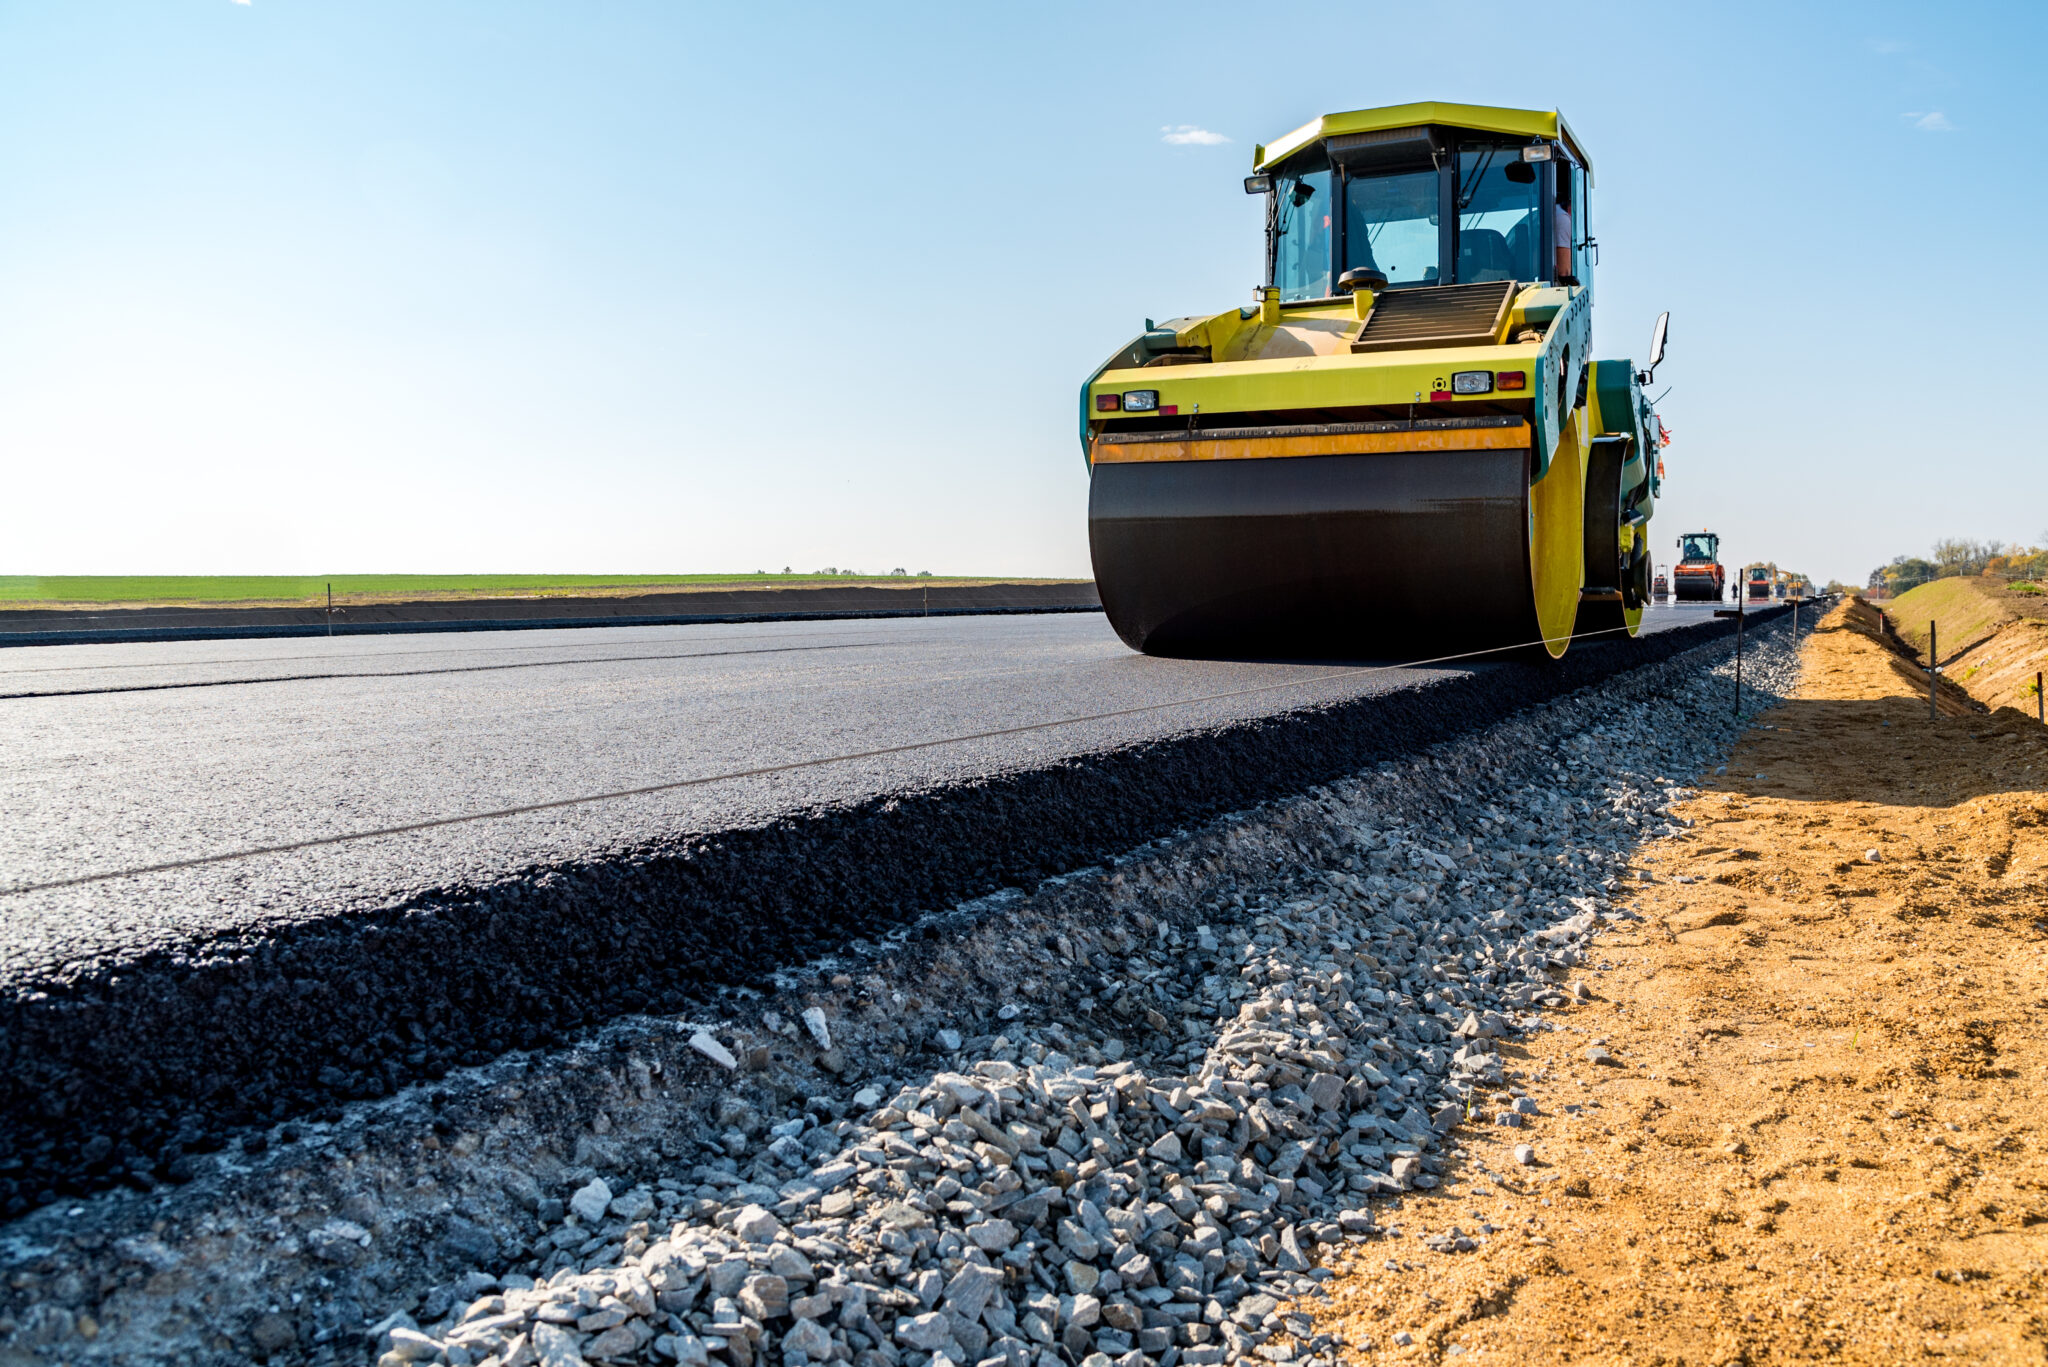
- Asphalt Paver: Distributes and levels the asphalt mix evenly across the surface.
- Compactor/Roller: Compacts the asphalt into a smooth and even surface.
- Dump Trucks: Transports the asphalt mix from the plant to the site.
- Sweepers and Brooms: Clean the surface before and after paving to remove unwanted debris.
In most places, the equipment can be rented if you do not own them. Make sure to choose a reputable rental company with well-maintained equipment. If you are not planning on laying the asphalt yourself, a professional contractor will have all the required equipment.
The Steps of Asphalt Paving
Whether you plan on laying asphalt yourself or hiring a contractor, understanding the steps involved in asphalt paving is important. Here are the general steps for laying a new asphalt pavement:
Step 1: Demolition and Removal
The first step in asphalt paving is to remove any existing surface materials. Heavy machinery such as jackhammers, bulldozers, and excavators are typically used for this task.
Step 2: Grading and Sloping
Once the old surface is cleared, the next step is to prepare the base. This involves grading the area, so the final result is even and has proper drainage.
Step 3: Preparing the Sub-Base
The sub-base provides a stable base that supports the weight of the asphalt and the loads it will bear. It is spread evenly across the graded surface and compacted using rollers.
Step 4: Proof Rolling and Repairs
After the sub-base is in place, proof rolling is conducted to check for any weak spots or areas of instability. If any weak areas are found, they are repaired by adding and compacting additional material until fixed.
Step 5: Laying the Binder Layer
The binder layer is the second layer of the asphalt structure, sitting directly on top of the sub-base. It is made of larger aggregate mixed with oil, providing additional strength and stability. This layer is spread using an asphalt paver and then compacted with rollers to create a solid, supportive layer for the surface asphalt.
Step 6: Installing the New Asphalt Surface
The top layer, known as the surface layer, is then applied. This layer consists of smaller aggregate, sand, and bitumen, which gives the asphalt the smooth finish we look for. The hot asphalt mix is transported to the site in dump trucks, spread evenly by an asphalt paver, and immediately compacted by rollers.
Step 7: Final Compaction
Multiple passes with a heavy roller are made to get rid of any remaining air pockets. This makes the final product smooth and visually appealing.
Step 9: Cooling and Curing
Once the asphalt is compacted, it needs time to cool and cure. During this time, typically 24 to 48 hours, the area should be closed to traffic to prevent any damage to the new surface.
These steps may vary slightly depending on the specific project and location, but they provide a general overview of the asphalt-laying process. Consult with a professional asphalt contractor for the best approach for your specific needs.
Maintenance Tips for Newly Laid Asphalt
After a new asphalt surface is installed, proper maintenance can keep it in top shape and prevent issues from popping up.
- Sealcoating: Applying a sealcoat protects the asphalt from UV rays, water, and chemicals. After a fresh surface is laid, wait at least six months before applying a seal coat to allow the surface to be fully cured.
- Sealing Cracks: Regularly inspect the asphalt for cracks and seal them quickly to prevent water from seeping in and causing further damage. For best results, use a high-quality crack filler.
- Regular Cleaning: Keep the asphalt surface clean from debris, oil spills, and other contaminants. This is one of the most manageable preventative maintenance steps you can take to keep your asphalt looking new.
- Repairs: If you notice any damage on the asphalt, get it fixed quickly before they have a chance to turn into something bigger. Partner with a local asphalt maintenance company for regular check-ups and repairs.
It can be easy to forget about your new asphalt surface once it’s installed, but regular maintenance can extend the life of your pavement and save you money. Follow these tips and be proactive instead of reactive.
Keep New Asphalt in Top Shape with Superior Asphalt
If you are planning on paving a surface or have already laid asphalt, make sure to follow the proper maintenance steps. After all, you don’t want to go through the process above just to have your new asphalt deteriorate quickly. Superior Asphalt offers high-quality maintenance and repair services for freshly paved asphalt, helping you keep your surfaces in top shape for years to come. Whether it’s addressing small issues before they become big problems or being proactive with preventative maintenance, our team of experts has you covered. Contact us today for a property-specific quote!